sorry to anyone who had trouble subscribing to my new blog. there were a few glitches that are now figured out. please click here to subscribe for email updates. again, sorry for the confusion.
thanks again everyone!
xo – lindsey
sorry to anyone who had trouble subscribing to my new blog. there were a few glitches that are now figured out. please click here to subscribe for email updates. again, sorry for the confusion.
thanks again everyone!
xo – lindsey
if you’ve found your way here, dollyandoatmeal has moved from WordPresss and can be found at dollyandoatmeal.com
also, you can sign up for emails here, as my posts and updates will no longer show up in the Reader
thanks everyone!
xo lindsey
dollyandoatmeal will continue to be the same blog you’ve come to know, it will just look a little different. i know for us wordpress people, our Reader keeps us up-to-date and checked-in with the blogs we follow. since i will not be on wordpress any longer you If you would still like to be notified of posts without checking the site all the time, as I know I do with other blogs, please sign up here to get email notifications. if not, then i can still be located at dollyandoatmeal.com. also, you can find dollyandoatmeal on bloglovin’. it’s a really easy way to keep up with all the blogs you love (think of it as a ‘Reader’ but for all blogs and websites).
thank you wordpress peeps!
xo – lindsey
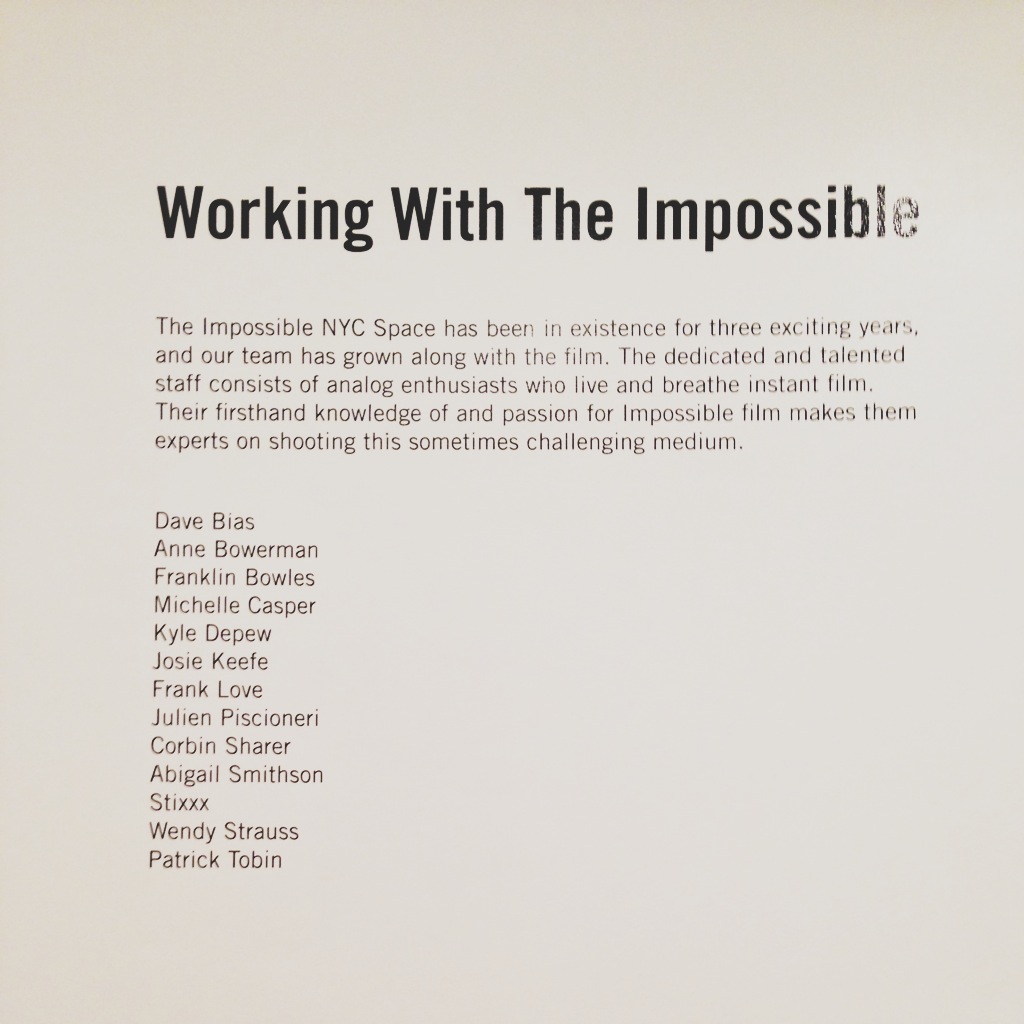
this past thursday night, frank and his fellow co-workers at the Impossible Project , were featured in an Impossible staff show. some their awesome photos are below. for those of you not aware, the Impossible Project is a company that is slowly but surely re-introducing the world to instant film, i.e. Polaroid film. as you can see from the the images below, the film produces a really great vintage-y picture. but anyone out there who still owns a Polaroid camera should give the film a shot (no pun intended).


in other news, me and frank are in the midst of the pre-wedding craze. on saturday we had a cake tasting at babycakes in the city. we got to taste some pretty amazing things including a chocolate cupcake, a vanilla cupcake, a mocha frosting brownie cupcake (which was the most amazing thing i’ve tasted in a long while!), two different doughnuts, and a chocolate chip cookie sandwich. whew, i hadn’t had that many sweets in a long time. if you’re ever able to sample the gluten free and vegan goodies from babycakes please do so, i highly recommend them.

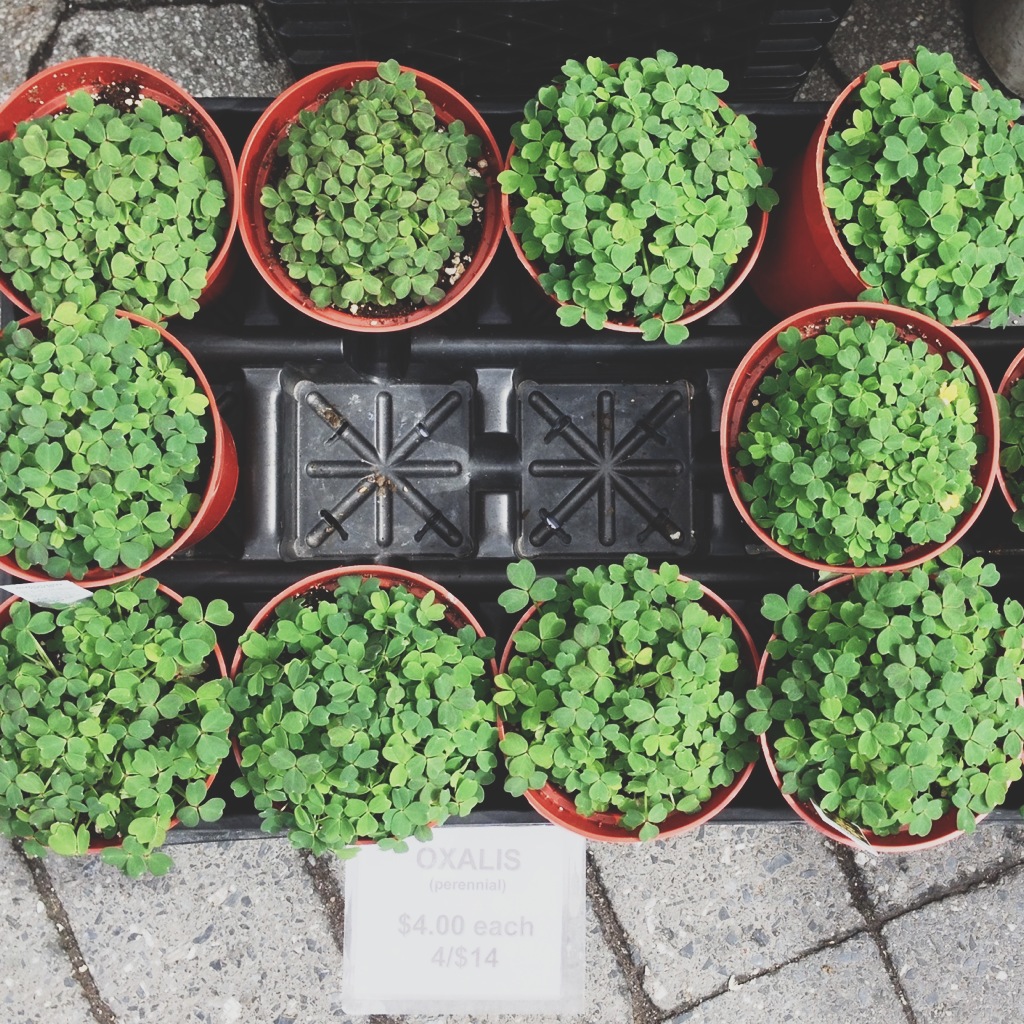
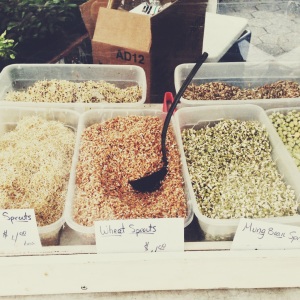
some pretty sprouts at the farmer’s market.


this is dry dock, our local wine and spirits store. this past wednesday they returned to their original storefront that had gotten damaged during hurricane sandy back in october. we’re super happy to seem them back!


sometimes ideas of recipes come to me. other times i need to search high and low for inspiration. i really don’t like making something just to make it. i prefer to be inspired by an ingredient, or an idea. usually these ideas get stuck in my head until i figure them out. having gluten and dairy intolerances can get in the way of making an ordinary recipe, but that is part of the fun. i love finding interesting recipes, making substitutions, and producing something that is within the confines of what my body can tolerate. i really take joy in finding ways of making food tasty and yummy and the best i can possibly make it. having this blog has let me be creative in so many ways that i wouldn’t have been in my non-blog life. big thanks to supportive people out there.
i’ve been making a lot of recipes lately revolving around ingredients that i see at the farmer’s markets. i never saw myself as someone who cooks only with what is in season. however, i’m finding that one ingredient can inspire an entire dish if you you let it. the ingredient of choice this time around was spring garlic. i thought they were so beautiful, and i immediately had recipes running through my head. the spring garlic has a similar taste and smell to garlic cloves, but the texture is more onion-like. i’ve sautéed them, roasted them, and eaten them raw (i encourage only people who really love garlic to do this), all yielding awesome results.

crispy spring garlic + yam salad
inspired by Adina Niemerow – Food & Wine, March 2012
serves 2
1 large white yam or sweet potato, cut into 2-by-1/3- inch sticks
1 1/2 cups miner’s lettuce (you can substitute mung sprouts, or adzuki sprouts,or any other seasonal sprout)
2 cups packed lettuce greens
1 small cucumber, cut into 1/2 inch dice
6 stalks spring garlic, bulbs finely sliced, greens discarded (scallions will work too)
1 ripe avocado, sliced
1 tablespoon sunflower seeds, toasted
1 teaspoon sesame seeds, toasted
3 tablespoons olive oil
large grain sea salt

// dressing
1 tablespoon fresh lemon juice
1 1/2 teaspoons balsamic vinegar
1 1/2 teaspoons low sodium tamari
1/2 teaspoon honey
2 tablespoons olive oil

// directions
pre heat oven to 375°
line a baking sheet with parchment paper
in a bowl, toss the potato sticks with about 2 tablespoons of olive oil (use more if needed), and a couple pinches of large grain salt. turn out onto baking sheet and bake for 30-35 minutes, until crisp and lightly browned – flip them over every 10-15 minutes. remove and let cool
while the potatoes are baking, heat a skillet on medium. coat pan with olive oil. add sliced garlic, and sauté until crispy – about 8 minutes. remove from heat and drain the garlic on a paper towel to remove excess oil
in a small bowl, combine the lemon juice, balsamic, tamari, and honey with the olive oil
in a large bowl, combine the lettuces, cucumbers, crispy garlic, baked yams, and sliced avocado with the dressing. sprinkle with seed mixture, serve and enjoy


eggs in general are not the most interesting thing to talk about. so instead i’m going to talk about the plethora of amazing produce that was at the farmer’s market this weekend. there were all sorts of greens: mugwort, miner’s lettuce, mustard greens, tatsoi (which i learned is a variation of mustard spinach), watercress, and ramps. out of all the greens i came across i chose to incorporate ramps into my dish because of their subtle onion flavor, and because their greens (unlike some other onion plants) can be eaten and enjoyed. i decided to use parsley and thyme because that’s what i had that was fresh. this was the first time i used yogurt instead of milk. i was pleasantly surprised by the end result: the egg had a soft, creamy texture, and was really light. i used unsweetened soy yogurt, but i could see how greek yogurt would add an even greater flavor. this is one of those recipes you can add to, and play around with ingredients. so please do : )

1 bunch ramps, trimmed, bulbs sliced, and greens chopped (reserve some greens or garnish)
1 small shallot, minced
1/4 cup fresh herbs (parsley, thyme, tarragon, cilantro), chopped
5 eggs
1/2 cup yogurt (i used soy yogurt, but greek yogurt would be delicious as well)
salt and pepper to taste

// directions
pre heat oven to 350°
in a medium bowl, mix eggs with chopped herbs, yogurt, salt and pepper. let the mixture sit for about 30 minutes
in an oven proof skillet, heat olive oil over a medium heat. (i took a pastry brush and coated the sides of the skillet, so that way the eggs wouldn’t stick when i added them later on.) add ramp bulbs and shallots. cook for 5 minutes. add ramp greens and cook until wilted – about 2 minutes
add the eggs to the skillet, turn down the heat to medium low. let the eggs set a bit; until the sides are solid and the top is set and maybe a little jiggly
transfer the skillet to the pre heated oven. bake for 7-10 minutes. eggs should be set and fluffy. cut, serve, and enjoy


as i’ve gotten older i have come appreciate different flavors and textures coming together in one dish. that said, for a long time i stuck to eating a limited amount of food because of my dislike for so many things out there. so, if you asked me a few years ago if i would eat eggs with beans and avocado, my answer would be “absolutely not!” this dish is composed of a bunch of ingredients i wasn’t too familiar with, mostly black beans. i’m not a bean person. i don’t like them cooked, baked. fried, nothing. but i really liked the idea of making a puree out of them, much like making hummus out of chickpeas. but i wanted somewhat of a molé sauce flavor, kind of like the sauce frank and i get at our favorite mexican restaurant. therefore, i added nuts, seeds, some garlic and shallot, and even cinnamon to bring out the molé tastes and tones. the puree has quickly turned into one of my favorite things. it has a distinctly sweet and savory flavor which i look forward to pairing with other dishes.
i chose to make the huevos rancheros with poached eggs. my blogger-friend, edelyn over at egeedee.wordpress.com, posted an amazing looking poached egg recipe. since then i have been honing my poaching skills and i think they’ve gotten good enough to offer the rest of the world some advice on egg poaching. anyhoo, you can scramble your eggs, fry them, soft boil them, whatever makes you happy. it will all taste good with what’s going on here.

·· black bean puree ··
2/3 cup dry black beans, soaked and cooked
1 shallot, chopped
2 garlic cloves, chopped
1 tablespoon sliced almonds (if you’re using whole almonds you may want to toast them in the oven)
1 tablespoon pepitas
1 teaspoon sesame seeds
1/2 teaspoon chili powder
1/4 teaspoon cumin
1/4 – 1/2 teaspoon crushed red pepper flakes (add more or less depending on your preference)
3-4 peppercorns
1/8 teaspoon cinnamon
1/4 cup reserved water from the beans (if you’re using canned beans lukewarm tap water will work)
2 tablespoons olive oil, plus more for sautéing
2 tablespoons fresh lemon juice
fine ground sea salt
·· directions ··
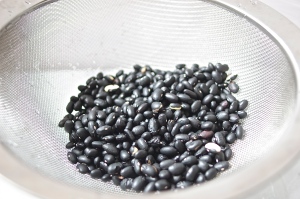
soak your bean overnight (in a bowl, cover the black beans with a couple inches of water. they will expand and soak up some water, so use more water than less.)
drain and rinse the soaked beans. place them in a saucepan with a couple inches of water covering them. bring the water to a boil and simmer the beans until they are cooked through and tender – about 20 – 25 minutes (it might take longer depending what kind of beans you are using.) drain beans and let them cool. *don’t forget to reserve 1/4 cup of cooking water
while the beans are cooking, heat a skillet on medium heat. once hot, add a layer of olive oil. add the shallot – cook for 3-4 minutes stirring often. next, add the garlic – cook 2-3 minutes, stirring often. add the almonds, pepitas, and sesame seeds. cook until the nuts and seeds are lightly toasted and fragrant (you may need to adjust the heat on your stove, as you don’t want the shallot or garlic to burn) about 7-10 minutes. remove from heat
in a food processor, combine cooled beans, shallot and nut mixture, olive oil, lemon juice, and spices. as the mixture is blending, drizzle the reserved water in a little bit at a time until you have reached desired consistency. add salt to taste
transfer the puree to a bowl and let it rest in the refrigerator for at least 30 minutes, more if you can

·· huevos rancheros ··
// serves 2
2 mini tortillas
2 eggs, room temperature
1/4 cup black bean puree
1 ripe avocado, sliced
1 tablespoon fresh cilantro, chopped
sea salt
fresh ground pepper
hot sauce to taste
·· directions ··
pre heat oven to 350°
prepare a baking sheet with parchment or tin foil
toast tortillas in the oven for 5 minutes. remove from oven, turn down the temperature to 200°. slather the tortilla with black bean puree. transfer back to baking sheet and keep warm in the oven
bring a pot of water with about a tablespoon of vinegar to a simmer. while the water is heating crack each egg into a small bowl or cup. just before the water starts to boil, use a spatula to make a vortex. (the spinning water helps the egg white to form a “shell” around the yolk.) gently slide the egg into the water, let it simmer for a few minutes. i don’t like my eggs too runny, so i poached them for about 4-5 minutes. if you like yours runny, poach for 3-4 minutes. remove the egg with a slotted spoon and place on a paper towel to drain. repeat with the other egg
remove tortillas from oven and top with poached egg, sliced avocado, cilantro, salt, pepper, and hot sauce. enjoy 🙂

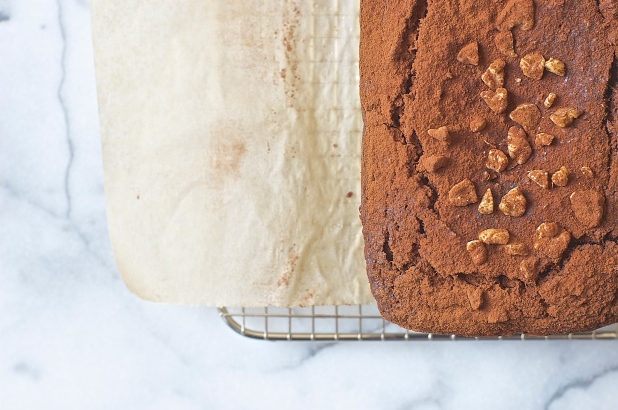
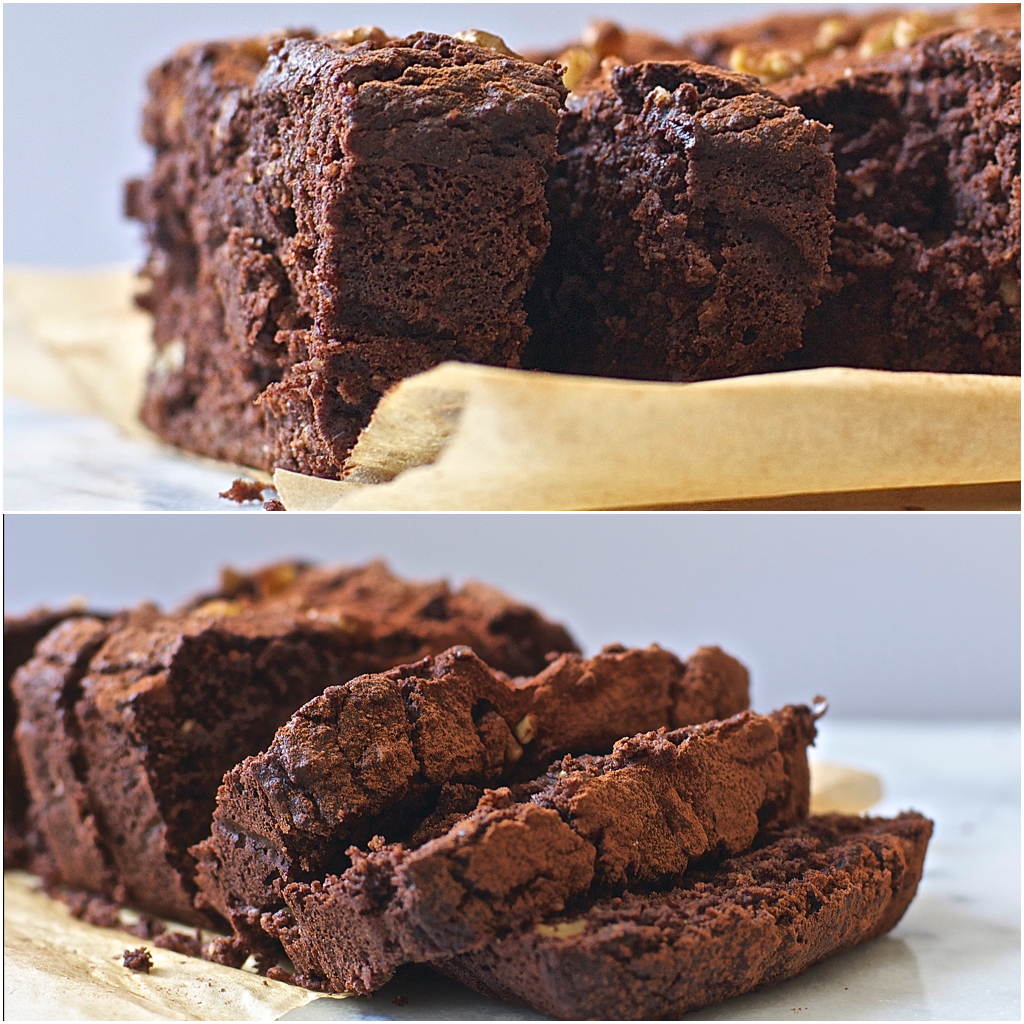
yes, i know, not another banana bread recipe. but this one, at least for me, is different. i have yet to see, or come up with a gluten free banana bread using nutrient rich flours. unlike most gluten free flours, oat flour, buckwheat flour, and almond flour, are easier to digest, and have nutrients and minerals that are beneficial to your body. health aside, i really enjoy a good banana bread. there’s a place across the street from us that has a chocolate or cocoa banana bread that is insanely good. frank would often get a slice, and give me some bites. since then i have been thinking about that bread and trying to recreate it. this is the closest i’ve come, and i hope you enjoy it.
the original recipe does not include cocoa powder or chocolate, so i made some changes. since i was adding cocoa powder (which is quite dry) i reduced the amount of flaxmeal by a tablespoon. also, i used agave in place of honey, and used a little less than what was called for. in addition, i reduced the amount of vanilla extract because i was adding chocolate. if you’re wanting to make cocoa banana bread and you aren’t gluten free, or don’t have the flours listed above, you can easily add cocoa powder and chocolate to your go-to banana bread recipe.
recipe adapted from Edible Perspective
makes one loaf
·· ingredients ··
1 cup oat flour
3/4 cup buckwheat flour
1/2 cup almond flour
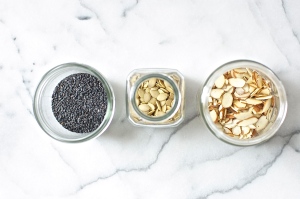
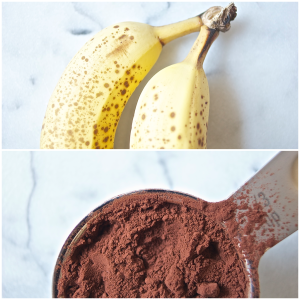
1/3 cup cocoa powder (reserve one tablespoon for dusting)
1 tablespoons ground flaxmeal
1 teaspoon baking powder
1/2 teaspoon baking soda
1/2 teaspoon fine grain sea salt
2 ripe/overripe bananas, mashed
2 eggs, room temperature
1/4 cup raw agave nectar
1/4 unsweetened almond milk
3 tablespoons coconut oil, melted
3 tablespoons unsweetened applesauce
1 teaspoon vanilla extract
1/2 cup chopped walnuts
1.5 oz dark chocolate (70% cacao), chopped
·· directions ··
pre heat oven to 350º
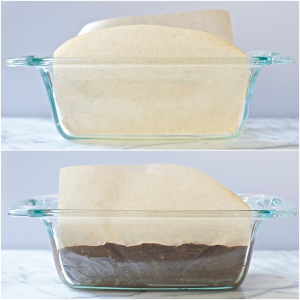
grease and line a 8×4″ loaf pan with parchment paper
in a large bowl, sift the dry ingredients and mix until combined (walnuts and dark chocolate excluded)
in a medium bowl, mix the wet ingredients until combined
mix the wet ingredients into the dry, and mix until combined. fold the walnuts and dark chocolate into the batter
using a spatula, guide the batter into the loaf pan and evenly spread to edges
bake for 35-40 minutes, until a cake tester comes out semi clean – some spots will come out more chocolatey than others because of the chopped chocolate
let it cool on a baking rack for at least 30 minutes. dust with cocoa powder, serve and enjoy

growing up my parents would rarely let my brother or i eat anything with the label “drake’s cakes” or “hostess” probably because those words were synonymous with junk food. as a kid i never understood why they were so opposed to twinkies, ring dings, ding dongs, what have you. however, as an adult who cares what i put in my body, i totally get it. but, like any other person, i still crave a moist chocolate cake – perhaps with some cream – and a chocolate shell. in order to get a slightly (dare i say) healthier version, i combined a couple of recipes. the cake is gluten free, and grain free, and is made with coconut flour. similarly, you can use your favorite chocolate cupcake recipe, or chocolate cake recipe, to make these. i covered only the tops of the cakes with a chocolate shell because i didn’t want it to be too sweet or heavy. but if you like it more chocolatey by all means cover the sides of the cake. these are really simple to make, and needless to say, really yummy.

· for the cakes ·
recipe adapted from Elana’s Pantry
1/4 cup coconut flour
1/4 cup cocoa powder
1/4 teaspoon fine grain sea salt
1/2 teaspoon baking soda
3 eggs, room temperature
1/4 coconut oil, melted and cooled
1/2 cup agave nectar

· for the cream ·
adapted from Comfy Belly
6 tablespoons vegetable shortening
2 1/2 – 3 tablespoons agave nectar (honey or confectioners sugar will work as well
3/4 teaspoon vanilla extract
· for the chocolate shell ·
1/4 cup dark chocolate chips (65% – 70%)
1 teaspoon coconut oil

· directions ·
pre heat oven to 375º
line a cupcake tin with 10 liners, or coat with oil/butter
in a medium sized bowl, combine the coconut flour, cocoa powder, salt and baking soda
in a large bowl, combine eggs, melted coconut oil, and agave. add the dry ingredients to the wet – mix until thoroughly combined
using a spoon or ladle, fill the cupcake tins with the batter using a little less than a 1/4 cup measurement
bake for 20-24 minutes, rotating the tin halfway through. allow to cool
while the cakes are cooling, use a spatula to combine the shortening, agave, and vanilla – combine until fluffy
in a microwave safe bowl, melt the chocolate chips in 20 seconds intervals, making sure the chocolate doesn’t burn. once the chocolate is melted, add the coconut oil and mix until combined
fill a piping bag with the cream. fill each cake, you will know it’s enough when the cake gets a little plump (a bit may squeeze out the top, that’s ok, just wipe it off before you coat with chocolate)
*if you don’t have a piping bag: use a small spoon, scoop a coned shaped portion from the bottom of the cake. using the small spoon, fill the hole with the cream. replace the cake that was scooped out. repeat with the other cakes
using a pastry brush, top each cake with as much of the melted chocolate as you prefer, let chocolate set at room temp, or in the refrigerator for about 10 minutes. serve and enjoy

